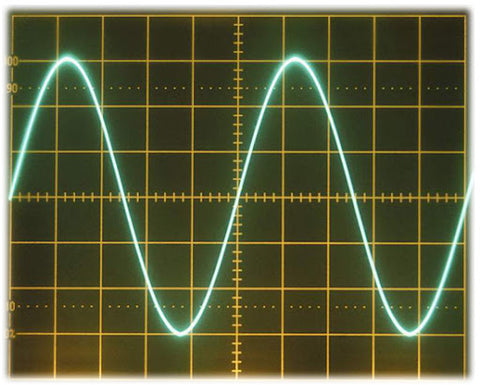
We all have had the experience of just at the critical moment, the power fails.
The game on TV is on a knife-edge, or the movie has reached the climax, and, suddenly, the electricity fails :(
Luckily, the pure sine wave inverter can come to the rescue, converting energy into power for our electrical equipment :)

This could be domestic demand or wherever else we need a reliable power source. So inverters can provide you with the convenience of electricity at all times.
Inverters combined with batteries make AC power available by converting the DC power stored in the battery into AC electricity to power our appliances.
Here we describe all the steps required to install a pure sine wave inverter.
Thanks to great strides in inverter technology, the process is relatively simple so that you can be the master of the TV once again by following the steps we are going to go through.
1. How To Install A Pure Sine Wave Inverter?
1.1 Overview
There are 3 types of pure sine wave inverter installations:
- Plug & Play
- Pure Sine Wave Inverter Connected To A Solar System
- Pure Sine Wave Inverter Connected To Batteries
1.2 Plug & Play
Plug and play units consist of an inverter and a battery conveniently housed as a unit. The wiring from the battery connects to the inverter, making installation and operation super easy.
These units use the regular domestic supply of electricity to charge the battery. In the event of a power failure, the inverter draws power from the battery to supply 120V to the appliances connected to the inverter.
Plug and play units make use of a two-way sequence. First, 120V AC is inverted to 12V DC to charge the battery. Then 12V DC is converted to 120V AC to power the connected appliances.
- Step 1
- Step 2
- Step 3
Complete House Wiring with Inverter Connection
2 Connecting A Pure Sine Wave Inverter To A Solar Panel System
Now we will deal with installing the pure sine wave inverter onto a solar panel system.
By now, you'll be familiar with solar energy being converted into electrical power via solar panels. The DC electricity from the solar panels passes through a charge controller that ensures an almost constant supply of electricity to the batteries.
2.1 Connecting A Pure Sine Wave Inverter To Batteries
Please take care of the solar panels' electricity before getting into the nuts and bolts of connecting the inverter. Somehow it seems that people tend to disregard the electricity delivered by the solar panels until they get startled by a spark or, even worse, get shocked.
- Step 1
- Step 2
- Step 3
- Step 4
- Step 5
For our purposes here, we're going to assume that you have calculated the power requirements of the inverter by adding up the watts of each piece of equipment you are hoping to use the pure sine wave inverter to power up.
3. Why Choose A Pure Sine Wave Inverter?

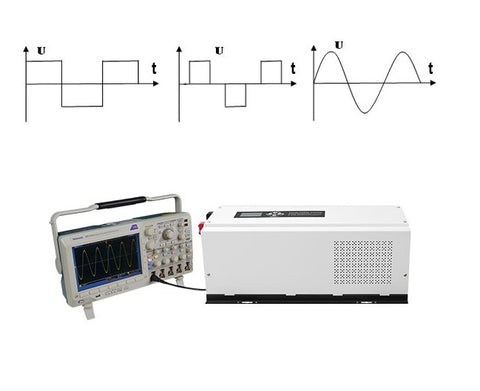
Pure sine wave inverters cost more than a modified sine wave inverter, but the added expense is required if you intend to run sensitive equipment or devices with AC motors.
We don’t need to go into the wave patterns of AC but suffice to say that many of the appliances we use rely on a smooth sine wave to function effectively.
I would be hesitant to plug my laptop into an inverter that is not a Pure Sine Wave Inverter.
So we advise not to skimp on this element. A pure sine wave inverter will suit all your electrical equipment requirements.
(On that note we thought it important to mention that all Bluetti solar generators come with built in pure sine wave inverters.)
4. Checking The Power Requirements Of Your Appliances
It's essential that you check that both the battery sizes and the pure sine wave inverter will deliver sufficient power for the equipment you intend to use.
4.1 How To Calculate The Power Required
Allowing for a safety margin, let's work on a 1 500 Watt inverter that is sufficient for the equipment. The question is, how many batteries will you require to supply enough electricity, and for how long?
4.2 Using The Formula
Inverter watts multiplied by required run-time hours are equal to the total watts divided by the DC volts. This is equal to the Amps required. This is quite a mouthful so let's break it down into little bites.
Say we want to run our equipment for 3 hours.
We multiply the inverter watts by 3 to get 4 500 Watts total and then divide this by the DC voltage of the inverter - 12V.
This gives us an answer of 375 Amps of power required to run our equipment for 3 hours.
This means that the batteries would need to produce 125 Amp-hours.
Bare in mind - completely depleting a battery will severely limit the battery's lifespan.
As such you will need to build a safety margin into your equation. This would typically mean only using fifty percent of the battery power. So, in this case, a run time of 1,5 hours would be an excellent standard to adopt.
(Note that the latest Bluetti solar generators include a LiFePO4 or (Lithium Iron Phosphate) battery. Lithium batteries are able to be depleted much more than any lead-acid battery. This means you can discharge your battery more than 50% without damaging it.)
5. Final Thoughts
Connecting a pure sign inverter to your electrical supply opens up a world of self-reliance.
The convenience supplied by the simple plugin type inverter and battery pack that delivers power to your computer or TV set when the domestic supply fails
It's all about the marvelous sense of satisfaction in attaching a pure sine inverter to your bank of solar panels and relishing the world of stand-alone power generation.
Pure sine wave inverters allow the utilization of conventional appliances in areas remote from domestic electricity. In addition, the convenience of a reliable standby source of power makes the 'working from home' scenario so much more dependable.
Electricity is as convenient as it is dangerous. So take care when dealing with solar panels. It is always wise to disconnect the supply from the solar panels when working on your system. It will keep you safe from many potential unpleasant surprises.
6. FAQ
1. Can you install an inverter yourself?
If you have been planning to buy an inverter for some time, but are wondering if the installation will be a hassle, you will be surprised to know that you can install it yourself. In fact, you can save the labor cost as well if you know how to install and connect an inverter in your house.
2. Do you really need a pure sine wave inverter?
Pure sine wave inverters are always needed if you're going to be tied to the grid. Typically, you'll need pure sine wave inverters for sensitive equipment, newer TV's, CFL light bulbs, and appliances with AC motors (microwaves and refrigerators).
3. What appliances need a pure sine wave inverter?
Some devices and appliances that require a pure sine inverter are:
- Microwaves.
- Laser printers.
- Variable speed tools.
- Cordless tool battery chargers.
- Some TV's.
- Key Machines.
- CPAP machines with humidifiers.
- Medical equipment.


